My Lovely Followers Thankyou :)

Showing posts with label crafters companion. Show all posts

Friday, 2 September 2016

Colourista UK LAUNCH - Only on Hochanda :)

Happy Happy Friday
Guess WHAT!!!

In one week - YES one week the UK Launch of the fantastic Colourista range will be coming to Hochanda :) 
YIPPEEEEEEEEEEE 

So we are Hopping again with some fabulous prizes along the way :)

You may have already seen some of the US launch shows and lots of inspiration from the team - defintely something we all want to get our hands on! I adore this range.

If you haven't already - don't forget to sign up to the FREE - yes FREE online colouring course :) Click Pic 
Our hop closes On September 9th 11.59 am and Sara will be announcing an overall winner LIVE on Hochanda! Winners from indivdual blogs will be announced on the Facebook pages of Crafter's Companion and Spectrum Noir on September 9th - exciting!!!!
If you are in the US you can catch the shows online www.Hochanda.com

The Blog hop begins on the Crafter's Companion Blog and ends on Sara's Blog
Be sure to leave a comment at each stop to be in with a chance of winning!
You should have arrived here from the Lovely Annie

I have 2 projects to share today :)
Using the gorgeous Colourista colouring pads, honestly these blew me away, the Glitter and the Foil what an amazing invention for colouring!

The first is a hanging plaque, I brought in a cheap shop and decorated it
I coloured elements from the A4 Colourista Glitter pad and the 5 x 7 Colourista glitter pad, cut them out and shaped the flowers, I used the Colourista colours to colour with and the shine you see in the photo has had no enhancement, it is the pure glitter! The pens blend magically over it! and the bestest bit is the glitter stays put! you are not covered in it from colouring! The more I colour over Glitter the more I become addicted to it! 

The second project I have to share today is the fab Foil pad :)
Oh me oh my
The resist from the foil on this I love, its almost like you try to make the foil disappear but it is not having it and shines through, I adore this pad, and wanted to do something a little different than traditonal colouring, so I got out my sparkle pens and washed over the sheet with water then dripped ink directly from the pens onto the sheet, love it!
I just love the effect! I think I will be doing a few more like this, one of my fave things to do with sparkle pens lol

I kept the card basic as the images says it all :)

Thanks so much for popping by today - I really hope you enjoy the hop - don't forget to leave a comment for prizes :) yay

We also have a WATCH PARTY event happening on Facebook - do join up :) its FREE and FUN

Your next stop is my loverly Friend Bianca

Have a GREAT Weekend
Jo
x x x

Crafter's Companion - START HERE
Jo Mckelvey - YOU ARE HERE


Tuesday, 3 May 2016

First Biccys - Now Cake...

Gosh I am proper spoiling you this week!
Good job its virtual eh! 

Today I have a Verity Rose make to share with you :)
Its a scrummy one too - cake - and not just any cake - CHOCOLATE cake
yes please nom nom
This was a project I made for the fabulous Verity Rose Collection from Crafter's Companion :) you will find all things Verity Rose in the Crafter's Companion Shop 
This was so much fun to make, I used centura pearl then made a cake slice from it - I actually made a whole cake - but it was absolutely HUUUUUUUUUUUUGE so I opted for the 1 slice instead! Love that you can actually pop something inside if you want too. For my base I used an upside down paper plate, I covered it in doilies (these ones are from Sara's love range) I then used some coloured centura pearl and some dies from the verity rose collection to decorate.

NOM NOM NOM
I screwed some little bits of coredinations card up to create crumbs

The candle is from a local supermarket pack, and I added a bow to the back

I was so super chuffed with this fork and spoon, they are plastic and I covered them in silver gliding wax, they looked so good! and real! The sentiment and image are both Verity Rose
Isn't she gorgeous! This is Cupcake - A girl after my own heart lol - tea n cake yep!

Spectrum Noirs Used
Skin - PP4,FS6,8,TN2,3,4,BG5,FS2,7
Hair - FS8,6,PP4,BG4,5
Pink - pp4,fs6,8
Aqua - BT2,3,4
Cream - EB1,2,BG4
White - BT2,IG3,5,TB1, Blender
Grey - BG5,7
Green - LG3,DG1,2
Crystal Clear sparkle pen

Thanks for popping by
Have a loverly day
Jo
x x x

Thursday, 28 April 2016

Downton Filigree...

Say what?!
Yep really Downton Filigree dies!
These are incredible! I mean really!
If you are a die fan of any kind you'll need these! I honestly have not stopped using them as card bases, as matts and layers as aperatures - they are so much fun and so stylish!

This was a card I made for the launch
I used the largest circle filigree die to cut an aperature through my kraft card base, then I built the inside up using the filigree part and a quilling flower, lots of distress ink and some pretty papers from the Downton Abbey 12 x 12 paper pad, I finished it with a topper from the Downton Abbey kits - you will find all things Downton in the Crafter's Companion Website :)

Thanks for popping over
Have a great day
Jo
x x x

Monday, 11 January 2016

Mo Manning Monday...

Monday again...already
I'm waiting for the day the government add an extra day into the weekend! boy do I need one

I had a fab time seeing my Brother and his family on Saturday - his new little baby is absolutely beautiful - I made sure to get lots of snuggles. We grew up in different households so we are finally connecting as adults and I am so grateful to have him as a part of my life. He also has 8 children and 2 grandchildren so I'm even more happier - next to being a Mum being an Aunty is my most treasured thing - So as you can imagine I am totally over the moon!!! His Grandchildren are the most adorable twin girls and they turn 1 today, Happy Birthday Lillie and Poppie
X X X

So todays cards are what I made for them using gorgeous images from Mo Manning

I made two identical easel cards one for each of the girlies. I used A3 patterned card from Crafter's Companion and made my easel base using my Ultimate Pro. The number 1, lettering and swirls are from Die'sire and the heart, oval and fancy shape are spellbinder dies.

 Spectrum Noirs Used
Skin - FS6,8,PP4, FS2,7,TN2,3,4,5
Hair - EB3,5,6,8
White - IG1,3,5,TB1, BLENDER
Pink - FS6,8,PP4
Lilac - HB1,2,3,LV2,3
Beige - EB1,2,BG4
Sprakle pen - Rose Quartz


 The next cards of course had to be Bow cards and this were for them from their Mummy :)
I used centura pearl and papers from the Floral Delights range from Sara Davies range - you will find them in the Crafter's Companion shop. This is one of my fave images from Mo :) she is too cute. I used lots of dies on this one, the half doily, centre oval and chandelier are from the downton abbey collection, the leaf swirl, lettering and number is die'sire, the little Birthday sentiment is from the essentials only words collection. The heart is spellbinders. 

Spectrum Noirs Used
Skin - FS6,8,PP4, FS2,7,TN2,3,4,5
Hair - EB3,5,6,8
White - BLENDER, IG1,3,5,TB1
Pink - FS6,8,PP4
Sparkle pen Rose Quartz

Thanks for stopping by
Until next time
Jo
x x x

Wednesday, 15 April 2015

Sassy Studio Designs...

Hello Everyone
MIDweek already!

I am currently Guest designing for Sassy Studio Designs and currently they have a Progressive challenge over on their facebook page using the fab Smurfette , head on over to the page to find out all the deets and see what the team did

I first made a box using the daisy dreams A6 die from Crafter's Companion, I cut the die on some card and then scored lines along each edge of the die and cut away at an inch from those score lines to make my box up, I used the Big score board box feature, love that board.
I stuffed it with some crepe paper and I embellished the front with ribbon, pearls and paper, I mounted Smurfette with 3d glue. I coloured her up with Spectrum Noirs.

Thank for popping by
Jo
x x x

Friday, 13 March 2015

Friday 13th...

Hiya Everyone
Hope you are well
My post today has nothing Friday 13th related lol

I made a card for Mother's Day using the gorgeous Moonbeam Meadow Collection from Crafter's Companion - you should be able to find it over in the SHOP
I cut the image with a die and layered it up on my easel base, the papers are from the Sweet Treats cd rom :) (I love that one) the bunting from the recently launched Spring and Summer dies, the sentiments were computer generated, and lots of embellies from my stash. I coloured this up with Spectrum Noirs

Spectrum Noirs Used
Yellow - LY1,2,3
Grey - BG1,2,3,5
Peach/Pink - FS3,4,6,7,8,9
Green - LG1,2,3
Beige - EB2
Lilac - HB1,2,3
Aqua - BT1

Thanks for popping by Today
I hope its a good one
Jo
x x x

Saturday, 15 February 2014

Happy Mother's Day...

Hiya Everyone

Hope you are all doing ok, and staying safe with this weather
It laid off here a bit today, the worst we woke to was our garden table upside down across the patio, my heart goes out to all those in terrible situations - Biggest hugs to them all xxx

Today I have one of the first of this years Mother's Day cards to share with you
This is a beautiful image and my first coloured fully with the Spectrum Noir pencils
 This image took me 2 hours and 40 mins to colour up lol, and I found with these pencils that I didnt have to always use the blending soloution which I really liked. The sentiment was comp generated, the embellies are all from my stash, the fence a doohickey, the swirls from a die cut, and I added a little glamour dust to her wings.
 Pencils used
Skin - 005, 006, 085, 009, 089, 110, 094, 101
Hair - 110, 100, 103, 111, 120
Wings - 064, 077, 003, 078, 061
Purples - 077, 079, 082
Greens - 045, 046, 048
Aquas - 061, 064
Pinks - 039, 041, 042
Grey - 117
A view to show dimension :)

I would like to enter her into
Digi Galore - Wings

Thanks for Popping By
Have a Lovely Evening
Joey
x x x


Wednesday, 8 August 2012

Christmas in August

Hiya Everyone, Happy Wednesday, Hope you are all doing ok. I am going to try and get some cardage done today, I am so far behind on those Christmas Cards eeeeeeeeeeeeek. I have wrote a present list for Santa lol, but the cards might end up sliding again if I dont get a wriggle on!

Its time for another My Mums Craft Shop Challenge
Thanks for Sharing your Ice Cream Flavours with us last time we loved seeing them :) 
We have a New Teamie to Welcome this week too :) Do Hop on over and leave Kelly some Love :)
This week we have another EASY PEASY theme for you
"Christmas"
Oh Yes...... So if you are behind like me, you will be smiling to see this theme lol
Do check out what my talented teamies have done HERE, You can also check out our prize from the fabulous Whimsy Stamps
I have used this super duper cute image from the Humphrey range from Crafters Companion, You can get lots of Crafters Companion goodies over in the My Mums Craft Shop Store, Kitty also has some fabulous NEW Products arriving allllllll the time, I will be broke soon, actually I already am lol.
I coloured it up with markers, and added some flower soft, cut on a nestie and mounted, papers from my stash, as were ribbon and pearls.

I would like to enter this into
Papertake Weekly - Anything Goes
Crafty Hazelnuts Christmas - Fave Colours ( I adore Black on Christmas Cards)
Lets Ink It Up which is now called
No Matter Which - Anything Goes

Looking forward to seeing your creations this week

Thanks for Stopping By
Have A GREAT Day
Joey
x x x

Wednesday, 11 July 2012

Box Tutorial

Hiya Everyone, Hope you all ok, back again today with a tutorial on how I make my boxes, I didnt have time to do the envelope box yet, but will do soon for you :) I am in no way connected to any of the tools I use in this, just one very happy customer, and as I have had so many questions and requests on how I do them, I thought I would share, Hope it all make sense :)

PICTURE HEAVY!!!!!!!!!

 Tools I used
Score Pal
Nestie
Grand Calibur
Usual everyday, trimmer, glue, scissors, acetate
 The best thing about this Crafters Companion board is it comes with a colour booklet full of instructions, could I find mine NOPE, BUT, Thats a good thing it shows you, if like me you cant find it, you can still make boxes its just that easy!!! Wouldnt be able to make them without this nifty gadget!
I start with two pieces of card exactly the same size, as my finished card will be 6x6 I start with the two pieces cut at 8x8 I always go up 2 extra inches, so if it was a 7x7 card I would use two pieces of card 9x9 etc etc...
 The board has cm's on one side and inches on the other I use Inches, I always butt my board up against the edge of my scor pal, one day I will get the dazzling ultimate pro but for now this works. I score all sides at 1 inch, to the left side is the box lid and to the right the box base it is marked on the board for you :) I always make my lid with a little L to remind me lol
 On the above pic you can just see in the bottom right corner where it tells you box base, again I score the base at 1 Inch
 Just to show you it says Box Lid to the left

 You will end up with 2 8x8 pieces of card Scored at 1 inch all round, one using the right side (lid) of the board and the other using the left side (base) of the board
I cut a diagonal line in each corner and take of a little triangle, bin those

 I then score along each of the lines
 To make the acetate window, I use a nestie, I lay it out on my box and tape it down, I then lay a 3rd piece of card over the whole lot, this is so the nestie cuts a window in a spare piece of card to keep the inside of the box neat
 Run through your calibur
 So you will end up with 2 pieces which look like this
 Line up and mark the spare card, cut the excess of each side
 Stick your acetate window to the inside of your box
 Stick the spare piece of card over the top so it hides all the messy tape of the acetate
 I then glue the corners, I use wet glue and paperclips to hold it in place till dry
 I then decorate the lid, as whilst I make the card this will all be drying
 Here is my finished card using a sassy cheryl image, coloured with markers, the papers are basic grey, some pearls, some ribbon and the sentiment from the comp, flowers are wild orchid.
 Card in the box
It is even easier if you dont add acetate, and just keep the lid plain, when I do that I usually decorate the top of the lid to match the card inside. 

PLEASE EXCUSE ANY WET GLUE!!!!!!!!!
I had to take as I did else I would have forgotton lol
Talking of which hope I havent forgotton any important points lol

Thanks for Stopping By
Off for a loverly bubble bath then back for a nice cuppa, snickers and blog hop
Have A GREAT Evening
Joey
x x x

Wednesday, 16 November 2011

Sweet Humphrey

Hiya Everyone, Hope you all doing ok and well. 

I am here today with Humphrey, how I love this little guy! dont use him near enough as I should, so I dug out my pencils and coloured him up, I must colour up some more over the next week or so, I still have a stack of Christmas cards to make, I went through all I had, wrote them out and they are all sat in there envelopes waiting for December to come, my Ella has been at them already and opened a few argh, kids lol. 

I used my pencils for the colourwork and added some glamour dust to the image, I love the softness of pencils. The sentiment is also from a Humphrey set, the snowflake I cut with a nestie on acetate and covered it with diamond dust, the flowers from wild orchid, the papers and embellies from my stash.

I am going to enter this into
Crafters Companion - Let it Snow, Let it Snow, Let it Snow
Craft your Passion - Let it Snow
Totally Gorjuss - Christmas Traditions (red/green and snowmen)

Thanks for Stopping By Today x x x

Saturday, 8 October 2011

Humphrey Christmas

Hiya Everyone, Cor I feel as cold as this Humphrey must feel in this picture today! brrrr, still feeling sore, bit fed up with it now. Thankyou for all your kind wishes xxx

I have made this Humphrey card just because I wanted too really lol, I let my other commitments build up so have nearly finished those off and can have a little mess around :) I love Humphrey so very much, he is so easy to colour up and the images are too cute!
 I coloured him up with copics and promarkers, and I added Flower soft to his snow, and glossy accents to the postbox, love using that stuff. The flower soft does sparkle but the piccy hasnt picked it up to well, its that polar white one, lovely as snow, thought I had better use some of it up lol. Papers from my stash and sentiment is from Humphrey too.
I am going to enter him into 
My mums Craft Shop - All Creatures Great and Small
Secret Crafter - Anything Goes as long as it Sparkles (the flowers soft does)
Crafty Emmas - Seeing Red (hope there is enough red on this)
One Stop Craft - Anything Goes

Thanks for Stopping By Today, Have A Great Saturday x x x

Tuesday, 20 September 2011

Happy Humphrey Christmas :)

Hiya Everyone, Hope you all ok, its a dull day here, breezy too, I think the mornings are going to stay like this for the forseeable now, I like the darker evenings though time to stay in and snuggle :)

Anyway...
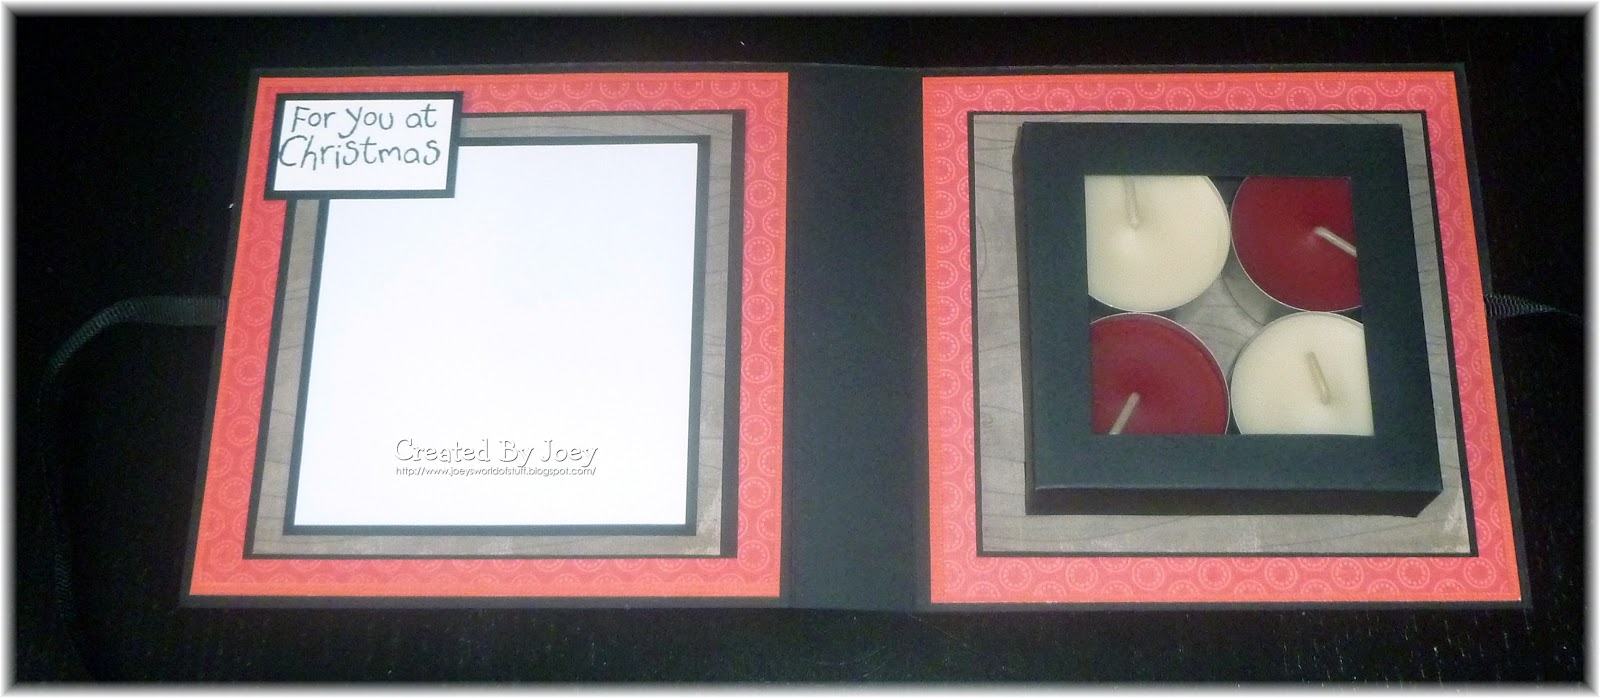
Yesterday I was Blog hopping and my Inky Impressions Teamie Carol had blogged the most fabulous Candle card, so I looked for a tutorial, which I found HERE, and boy does it make sense!!! Great Tutorial Thankyou, its different to Carols slightly, but it was Carol who inspired me Thankyou Hun :) anyhow lol they are so easy to make I feel I cant stop! I think they will make Great Teachers gifts :)
So my POTD had arrived and I had some coloured up so it was a natural progression to use those images, oh my gosh I LOVE THEM!!!
So heres my take on the Candle Card :)
 I did add some glamour dust for the sparkle, camera doesnt really pick it up
 Coloured with copics and pro's, and so easy to colour too :)
 The inside, I used 4 tealights, I get these from Ikea, 36 for £3 I think, loadsa different colours, guess whos going back for more loooooool
 I cut one of the sentiments up that came in with the POTD, I am so happy I have sentiments now for every Christmassy card I need! Great stuff! and the inside of this one, I think I may try to add more embellies and stuff but I really like these :)
I am going to enter these into

Thanks for Stopping By Today, Have a Wonderful Day x x x